Do you want to add game-changing portraits to your wedding portfolio? Are you looking for ways to knock the socks off your destination photography clients? Or do you just love making WOW-factor photographs that push you creatively and challenge your technical skills?
Long exposure photography is your new best friend – and you don’t need wildly-expensive tools or years of experience to try it!
We’ll guide you through four long exposure portraits styles you can create using tools you (probably) already have.
Understanding Long Exposures in Photography
Long exposure technique refers to how a camera shutter remains open, sometimes for a fraction of a second, several seconds, or more minutes. In effect, you can take blurry streaks and make a creative illusion in your images. These are the steps you can take to achieve this effect.
Prepare the Right Tools
Regardless of the niche, it’s essential that you have this shooting gear:
- Tripod: To keep the camera stable while shooting blurry movement.
- Remote Trigger: This one reduces camera shake while keeping your shots looking sharp.
- Lighting: The most common lighting options include flashes, LEDs, strobes, and light bulbs.
- White reflector: Helps prevent an area from being too dark and keeping your shots well-illuminated.
- ND filter: In photography, neutral-density filters act as sunglasses that enable you to see better when the sun is too intense. While you can limit the light coming into the lens, an ND filter allows you to shoot at slow shutter speeds and bright light.
Work With Your Lights
Too much light isn’t good for long exposures, so it’s best to shoot in darker locations. Since long exposure means keeping the aperture open for a long time, you may end up with overexposed images.
- Lamps: Lamps are good options if you don’t have professional lighting gear. While these are relatively cheaper, you’ll need to turn the lamps on and off manually as you shoot.
- Strobes: Strobes are among the most reliable light sources you can have for any type of photography. However, they are generally more expensive than lamps. On the plus side, you can pair them with a remote trigger to operate them wirelessly.
- Flashlights: Serving as handy sources of lighting, you can use flashlights to direct beams of light at particular locations.
Create Movement
One of the secrets to creating movement is to have fun experimenting with lights and moving subjects. These are simple ways to try shooting long exposure pictures.
- Create light streaks: You can use a portable light source like a flashlight to paint creative effects. Turn on the light and move it around to draw random lines, words, and patterns.
- Instruct your subject to move: One of the simplest ways to shoot motion is to have your subject move the head, hands, or the whole body.
- Move your camera: Moving the camera lets you have more control over the effects. If you are using a tripod, you can create cleaner streaks, especially if your subject moves up, down, or sideways. Another option is for you to move around as you reposition your camera.
- Blurry waters: This involves using a wide-angle lens with the smallest f-stop possible. Shoot in manual mode and a longer exposure to capture a dramatic, mistier water look.
Set Your Camera Into Manual Mode
Since this kind of photography entails some trial and error, it would be ideal for you to shoot in manual mode, so that you can program the camera freely.
For starters, you can choose the widest f-stop so that your lens can get more light even in a dark location. If not, your lens will find it difficult to focus in the dark. To keep your shots sharp, use manual focusing, and adjust the focusing ring as you deem fit.
Aside from that, you need to change the shutter speeds depending on the amount of light your camera can get. However, the best option is to use a slow shutter speed or at least half a second for fast-moving subjects.
Shoot in RAW
This kind of photography can be tricky, yet shooting in RAW allows you to recover overexposed images and edit elements to contain as much detail as possible.
Pro Tip: Never even heard of long exposure photography? Learn the basics with one of these terrific tutorials:
How To Set Up Your Camera For Long Exposure Photography (DigitalRev)
8 Tips for Long Exposure Photography (Adorama)
Tips and Tricks for Long Exposure Photography (Adorama)
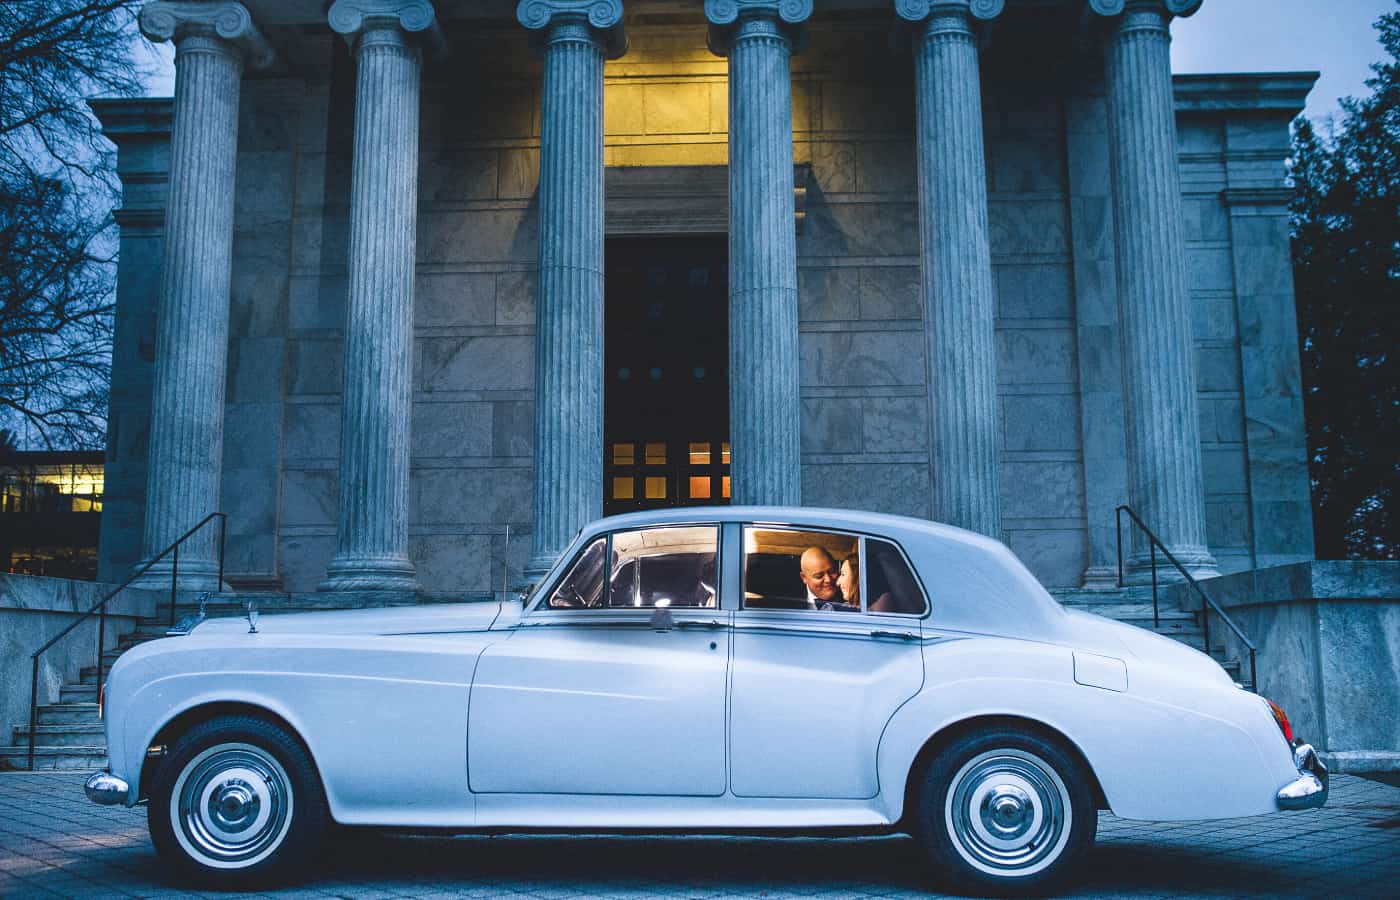
Photo by Mike Allebach
“Pop of Light” Portrait
Camera settings:
f/5.6
5 seconds
ISO 400
Time of day: late sunset
What you need:
- Tripod
- Flash
- Remote Trigger (optional)
Choose your scene, and place your camera and tripod accordingly. In a Pop of Light portrait, your long exposure will brighten the scene, and the pop of your flash will expose your subject. (You’ll still ask them to hold still, but it’s okay if they don’t quite nail it. It will freeze any minor movements!)
In these portraits, the flash is hidden in the front seat of the car, and bounces off the ceiling to fill the car with light. In close quarters like in these portraits, manually setting it to the lowest power (e.g. 1/128th power) would likely provide plenty of light, but you may need to experiment with different power levels and camera long exposure settings depending on the type of flash you’re using.
If you have a remote trigger, you can trigger it yourself when you press the shutter release button to take these portraits.
If you DO NOT have a remote trigger, show your client how to press the flash test button, and signal to them to press it after you’ve clicked the shutter. It will open long enough that there will be plenty of time for the flash to fire while you take these portraits. It doesn’t matter when you fire the flash during the long exposure.
Pro Tip: ONLY your ISO and f-stop (aperture) impact the long exposure from your flash. If it’s too bright in your portraits but you can’t power it down any further, you can
- A) lower your ISO to reduce your camera’s sensitivity to light, or
- B) close down your aperture to a higher f-number to let less light in.
You’ll notice then that your scene has become darker overall. That’s okay! Just drag your shutter speed even longer. (Your camera is on a tripod, after all! It doesn’t matter if it runs for 1 second or more!)
Remember: a slow shutter speed does not impact the long exposure of your flash, it only affects the long exposure of ambient lighting or existing light. This is because your flash’s light lasts for the same amount of time, regardless of how long your shutter is open.
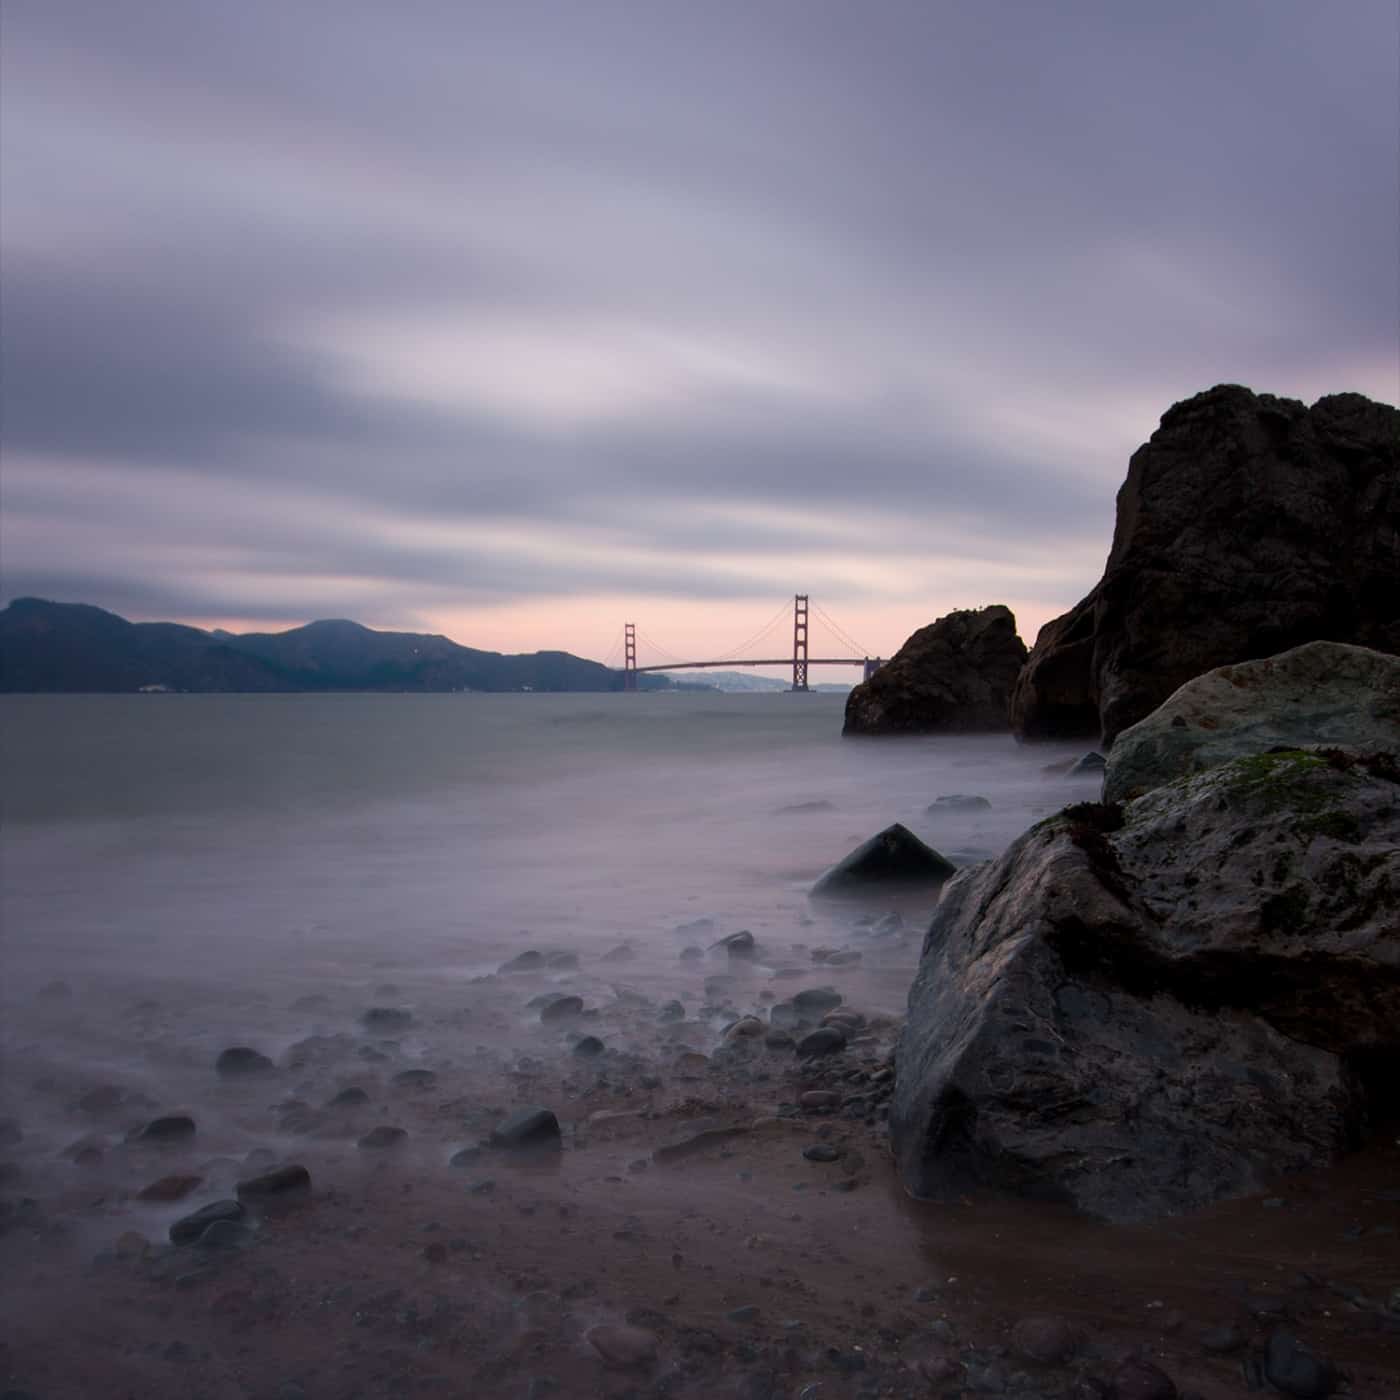
Photo by Ara Roselani
Ethereal Landscape
Whether you’re photographing landscapes for editorial or personal use, or setting the scene for an event you’re documenting, nothing captures the mood of a magical landscape like a long exposure.
Camera settings:
f/8
45 seconds
ISO 100
Time of day: early evening
What you need:
- Tripod
- ND (Neutral Density) Filter (optional)
Choose your scene and set your tripod. You may wish to shoot in the early evening, like Ara did, to capture more detail in the shadows, while still enjoying the softer ambient lights of the coming night.
To achieve this, you’ll want to use an ND filter, which reduces the ambient light reaching your film or sensor, allowing you to make long exposures even before nightfall. If you don’t have an ND filter, wait until dark to make that 45” long exposure!
Pro Tip: Don’t have a tripod on hand? Rest your camera on another solid surface! Tripods give you the most control over your angle and composition, but any stable surface can work in a pinch.
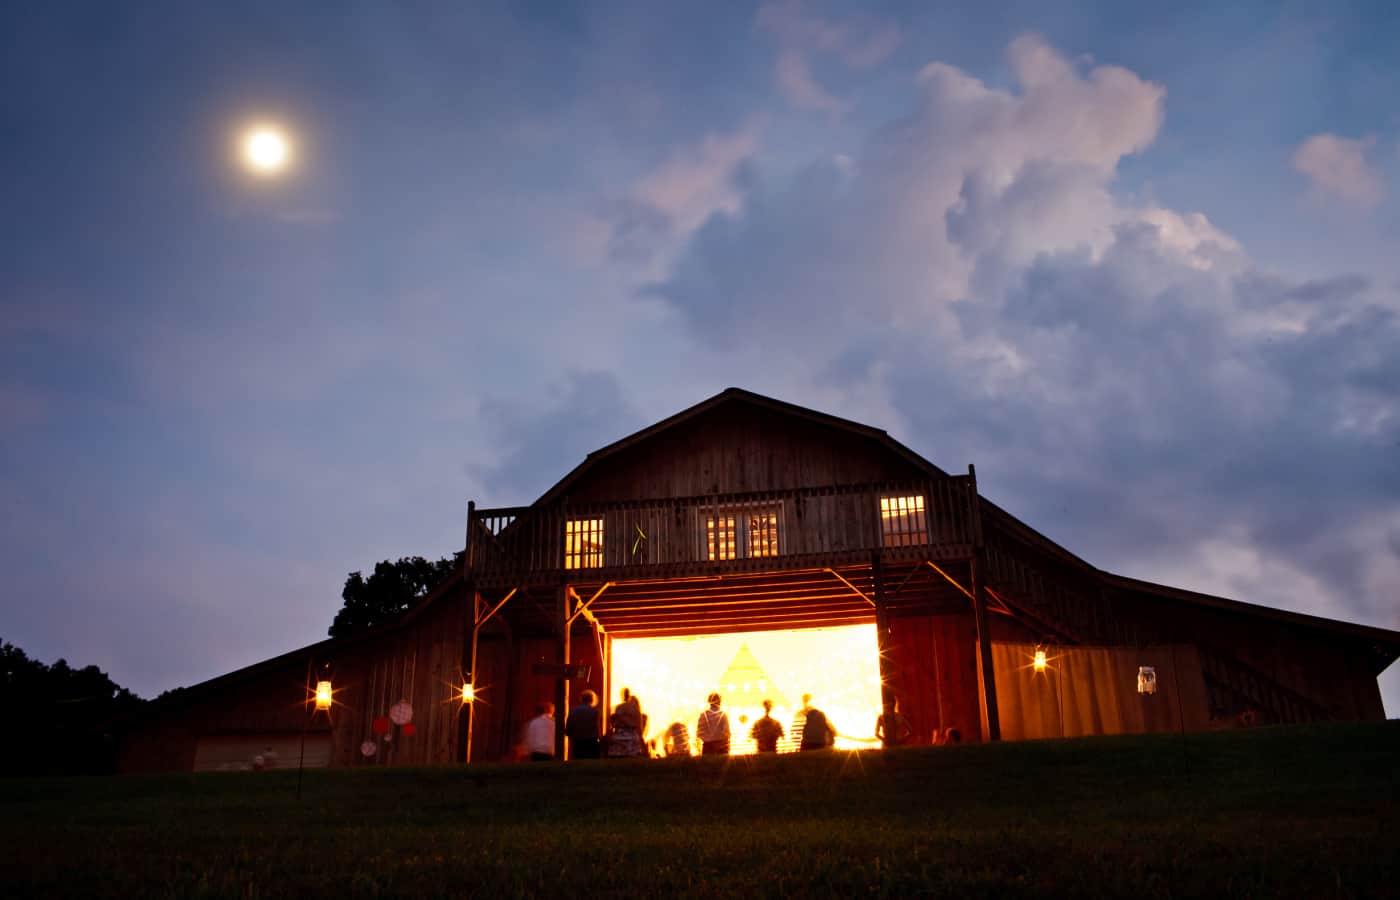
Photo by Anne Simone
The Venue At Twilight
Camera settings:
f/16
25 seconds
ISO 400
Time of day: one hour after sunset
What you need:
- Mini Tripod
- Willingness to lie in the grass
Photographed from a low angle, this long exposure highlights a wedding venue after sunset, before complete darkness has set in. The 25” long exposure enhances the brightness of the moon and the late evening sky’s colors; and at f/16, every corner of the photograph is crisp.
Nighttime venue photographs can be a great way to close out an album for couples who don’t have a grand departure, or who don’t book you through the end of their reception.
Pro Tip: If your image is too dark or too bright after your first attempt, think carefully about which of these you’ll change:
Your image is too bright:
- Decrease your ISO – if it’s not already on its lowest setting, which is usually 100.
- Decrease your exposure time. If you’re shooting at 30 seconds, try 25 seconds instead. Changing it will also change the amount of motion blur you capture, so if a bit of blur is your intention (as when photographing a waterfall, for example), make note of any differences.
- Close down your aperture. Changing it from f/11 to f/5.6 will reduce the light reaching your image by two stops – but it will also decrease your depth of field. Be sure your focus is sharp!
Your image is too dark:
- Try the opposite of the tips listed above!
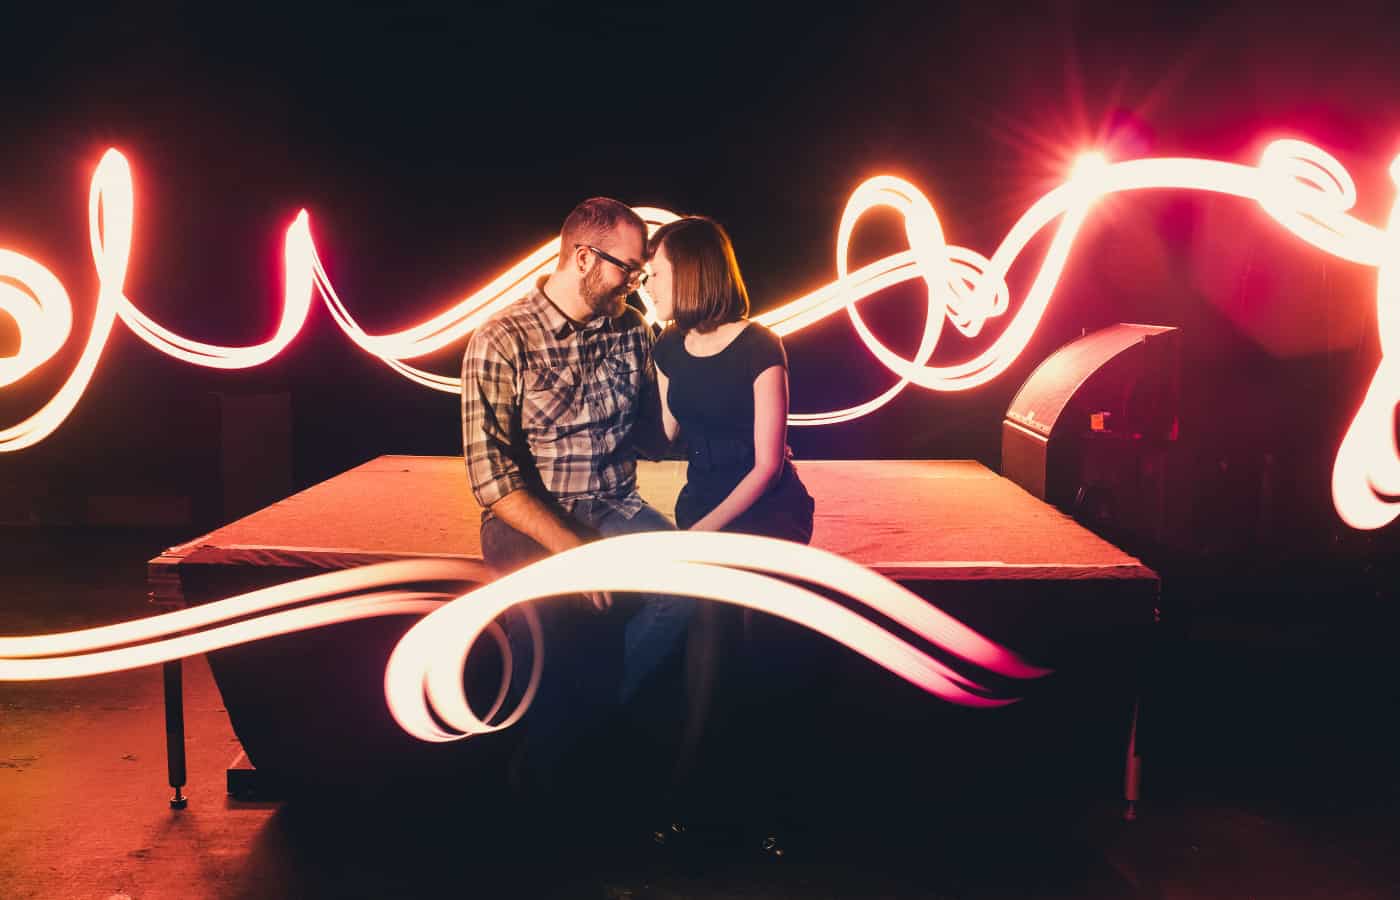
Photo by Mike Allebach
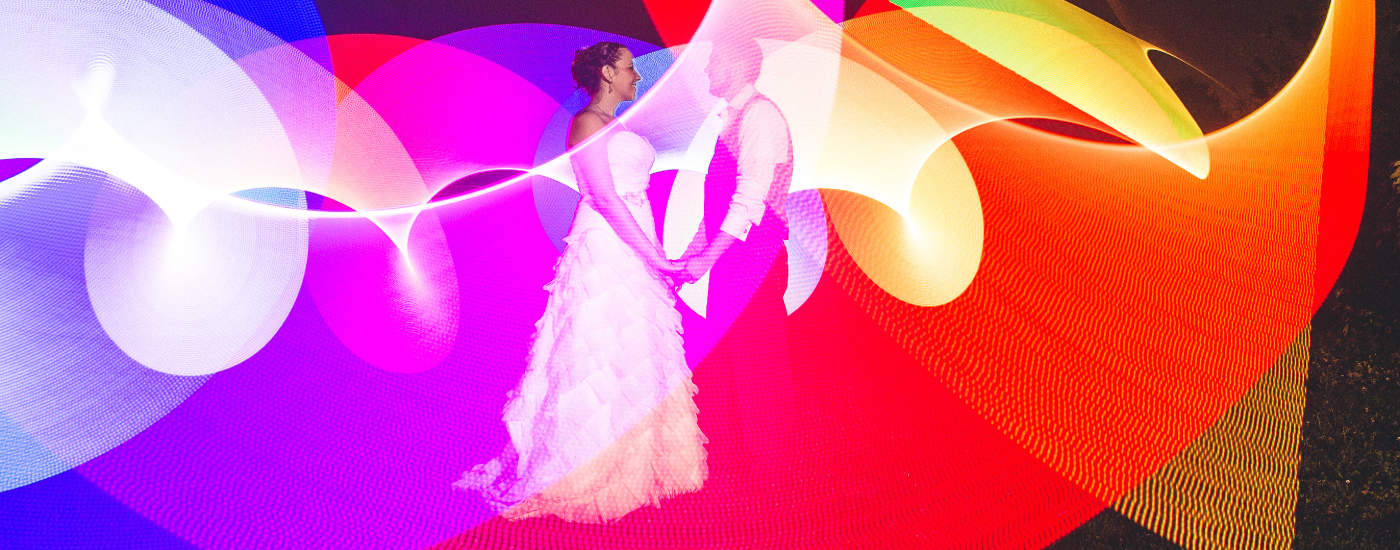
“Paint with Light” Portrait
Even the least fantastic space can be transformed with this creative lighting technique!
Camera settings:
f/8
10 seconds
ISO 400
Time of day: photographed indoors at midday
What you need:
- Tripod
- LED Flashlight
Instruct your clients to stay very still for these shots, since there is no flash to “freeze” them in the long exposure photograph. Instead, your flashlight creates both the light on the subject and the unique swirls of light swimming around them!
- Aim the flashlight at your camera lens to create the “painted” light streaks.
- Direct the light at your subjects to illuminate them! For more on painting with light, read here:
Beginners Guide To Light Painting (Digital Photography School)
Basic Guide To Light Painting Photography (PetaPixel)
How To Paint With Light (LifeHacker)
Pro Tip: Your tripod may sway when you press the shutter on your camera, so enable your camera’s self-timer. This gives you the chance to “settle down” after you press the button, so you won’t have any unwanted motion blur in your final shot.
Conclusion
After discovering the techniques for long exposure portraits, all you have to do is to keep practicing until you figure out the most suitable for you to shoot lots of beautiful images. Be patient as you try different methods, don’t be afraid to reposition your lights, and move around.
Can’t get enough of light painting? Duplicate the header photo, also by Mike Allebach, with a fun little gadget called the PixelStick! Mike shot the header image with these settings: f/11, 10 seconds, ISO 400, after dark.
Join ShootProof for FREE and learn fun stuff like this every week!
Or keep learning NOW with these fresh posts...
Comments